Thursday, May 14, 2015

Coffee Cake


Homemade Coffee Cake

Like coffee cake? Well, this one takes the cake for sure. Eat it plain with the crumb topping or place a dollop of whipping cream or icing or hey, make that caramel sauce from yesterday's post! Yum. Full recipe to follow pictures. 

Serve plain or make a frosting from
powdered sugar and cream
In a large mixing bowl, add 1 1/2 cups packed brown sugar
I used dark brown sugar


Add in 2 1/2 cups flour
I used King Arthur unbleached
all purpose flour
Add 1/2 tsp salt
Cut in 2/3 cup butter or shortening
I used Land O Lakes salted butter

Cut in until mixture resembles coarse crumbs,
remove 1/2 cup crumb mixture
set aside

add 2 tsp baking powder
1/2 tsp baking soda
1/2 tsp cinnamon
1/2 tsp nutmeg
to remaining mixture in bowl
In a second mixing bowl
beat 2 eggs lightly with a fork, then add 1 1/3 cups buttermilk or sour milk
I used 1 tbsp vinegar and finished the 1 1/3 cup with half and half
then
add the wet ingredients into the dry, stir just to combine well.
Because of the butter, it will be slightly lumpy.
Pour batter into prepared (sprayed with cooking spray, I use Pam)
9 x 13 inch baking dish
Sprinkle on reserved crumb mixture
Bake at 350 degrees (preheated)
35 minutes baking time
Hot from the oven! 35 minutes was perfect in my oven.
Preheat oven to 350 degrees Bake time 35 minutes makes 18 servings total time about 45 minutes

Ingredients:
2 1/2 cups all purpose flour
1 1/2 cups brown sugar
1/2 tsp salt
2/3 cup butter or shortening
2 tsp baking powder
1/2 tsp nutmeg
1/2 tsp cinnamon
2 beaten eggs
1 1/3   cups buttermilk or sour milk
1/2 cups chopped nuts optional 

Directions:
Grease the bottom and sides of a 9 x 13 pan set aside. In a large mixing bowl combine flour, brown sugar and salt, cut in butter until mixture resembles coarse crumbs. Set aside 1/2 cup crumb mixture. Stir in baking powder, baking soda, cinnamon and nutmeg into remaining crumb mixture. 

In another mixing bowl, beat 2 eggs and add buttermilk. Mix to combine. Pour egg mixture into dry ingredients all at once. Mix well and pour into prepared pan. Top with reserved crumb mixture and nuts. Bake at 350 degrees 35-40 minutes, test with a toothpick. Serve warm. 

Recipe on page 308 Better Homes and Gardens new baking book 1998


Wednesday, May 13, 2015

Homemade Caramel

Very good over the homemade vanilla ice cream 
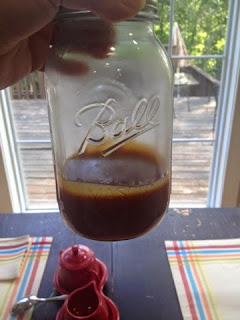
This jar was handy, it is too big for this amount.  As you can see, it does make quite a bit of caramel.

One cup of sugar in a medium saucepan over medium heat. Keep stirring, the sugar will begin to clump.

See, it is clumping!

Beginning to melt now!

Stir in 6 tablespoons butter cut into small pieces when the sugar is all melted and amber.

Keep stirring, I promise your arm won't fall off!

Keep stirring!

Now drizzle in the 1/2 cup heavy cream (whipping cream)

Stir in the salt, if desired. I wish I'd left it out of mine. 


Ingredients:

1 cup sugar
6 tablespoons butter (salted or unsalted) cut into small pieces
1/2 cup heavy cream (whipping cream)
1/2 to 1 teaspoon salt optional


Directions:

Heat the sugar in a saucepan over medium heat, stir constantly with a wooden spoon
Sugar will begin to form clumps then melt into thick amber liquid. Don't burn it, keep stirring
When sugar is completely melted, stir in the butter. This will bubble rapidly and may splash you, so be careful!
Stir the butter into the caramel until it is completely incorporated. May take 2-3 minutes
Slowly stir in the cream, stirring while adding.
Boil for one minute, remove from heat, 
Stir in the salt. 

Cool before using.

Serve over ice cream or cake.

Eat it with a spoon!

Store in the refrigerator up to 2 weeks (if it lasts that long!).

Warm slowly before using, place jar in water bath to warm.

This would be good to put into jelly jars and give as gifts at Christmas time. It would be good over homemade cinnamon rolls or coffee cake..... hum.....

I love all y'all❤️
To be continued........

Tuesday, May 12, 2015

Homemade Vanilla Ice Cream


So on Sunday I decided I wanted to try to make some ice cream. I bought a vanilla bean on Saturday to have because I've seen them used on cooking shows and I wanted to try it. And I did and today I tried the ice cream. It is good, and I will use that recipe again. And I will continue to use real vanilla beans from time to time, but because they cost a bit more than vanilla extract, it won't be in everything I make. For special occasions, though, worth the extra cost!!

Image result for cuisinart ice cream maker

The ice cream freezer I use is made by Cuisinart. I have had it for years, and have not used it in years. The freezer bowl goes in the freezer at least 24 hours before you want to use it, no salt or ice is required. The paddle fits inside and turn it on and in about an hour or so, you will have ice cream. These can be bought at Macy's and Dillard's I know. I don't have an old fashioned ice cream freezer that uses ice and rock salt. I might get one of those this summer though. 

Homemade Vanilla Ice Cream
by Ree Drummond

Ingredients
   1 whole Vanilla Bean, split and scraped
   3 cups half and half
   2 cups sugar
   8 or 9 egg yolks
   3 cups heavy cream

Directions
Heat half and half with the sugar in a saucepan over low heat, add the scraping from the vanilla bean to this mixture and then place the remainder of the bean into the mix. Remember to remove and discard the bean after heating. 
Beat the egg yolks until pale yellow and thickened. You may use a mixer if you wish, it takes a few minutes by hand. Then, after the hot mixture is ready, temper the eggs by slowly adding half the hot liquid, a little at a time, to the beaten eggs, whisking slowly while adding. After you have added about half, pour the egg mixture into the hot mixture and cook slowly over low heat until it thickens. Strain through a fine mesh strainer and pour into the heavy cream. Stir well to incorporate. 
Chill mixture completely and freeze in an ice cream freezer until thick. You may eat this, but it is very soft. You can put it into a freezer safe container and freeze about 6-8 hours until firm. Enjoy! It is good. And it has flecks of vanilla throughout like Breyers Vanilla Ice Cream. It is good. 

Link to Pioneer Woman blog post with the ice cream recipe. There are photos and step by step instructions. 


Sunday, May 10, 2015

It is how I was raised


I was raised in the 60s and 70s. When I was raised, when someone close to you passed away, you cooked food and took it to the home of the closest relative. When Rick died, people brought food. No, you really don't feel like eating, but you must eat. Our bodies do need food to keep going. It is helpful to have that food brought in and that way, those who are grieving don't have to worry about cooking.

I did have some pans and plates to return and that really wasn't a problem because they all lived very close. I was very grateful to not have to worry about fixing food. There was plenty. 

Yesterday I took food to the Woosleys who lost their son early yesterday morning. I fixed a caramel pie with whipped cream, 2 coconut cream pies, and meatballs in spicy sauce. Everything, including the whipped cream was in a container that they don't have to get back to me. I picked up the disposable aluminum pans and a reusable but also disposable plastic container for the whipped cream when I went to the grocery yesterday. That is one thing I am going to stock from now on. Disposable pans and containers for these very times. People do die. And taking food has continued in our circle of friends. So, Stock up and when it's your turn to take, you can use the disposable items and not have to worry about (not that you would really worry, just a figure of speech) them having to get your pie plates and other containers back to you.


Disposable pie pans

Homemade coconut cream pie in a disposable pie pan. This pan had a plastic under thingy and a cover so the pie snapped securely in it and the meringue was safe as well as keeping the pie covered. The plastic was strong enough to help support the pie.  I made my favorite pie crust recipe and it worked very well. Next time I am out, I am buying more of these pans and I am going to make the crusts ahead of time and freeze. Then in a couple of weeks, I will take one out and use it. If Pillsbury can freeze pie dough, then I should be able to as well. I know, no preservatives in mine so they are healthier,, but they won't store as long as the dough-boys. But, I wont make many at least at first. I have had a few opportunities to use them lately unfortunately. I will let you know in a future post how it turns out. I may make a post about this as I go. We will see. 
Larger disposable pan, great for meats.
This pan had a lid as well, and I placed the meatballs in it and covered them. They made it over to the Woosleys without incident. And there is no cleanup after - they just toss the pan and done. And they can reheat the meatballs in the oven in that pan if needed.

These meatballs went in the disposable foil pan. 

Be merciful to me, Lord, for I am in distress; my eyes grow weak with sorrow, my soul and body with grief.

I love all y'all❤️
To be continued..........